The Correction interface in VMP contains two main functions, Seam (seam correction) and Module (multi-batch adjustment).
¶ Seam Correction
The seam is caused by improper module or cabinet installation, also known as an edge line.
The seam correction is used to mitigate this phenomenon.
Because the seam is caused by installation, for software, the seam can only be optimized, and cannot be eliminated.
If want a perfect display, you need to re-install the modules and cabinets.
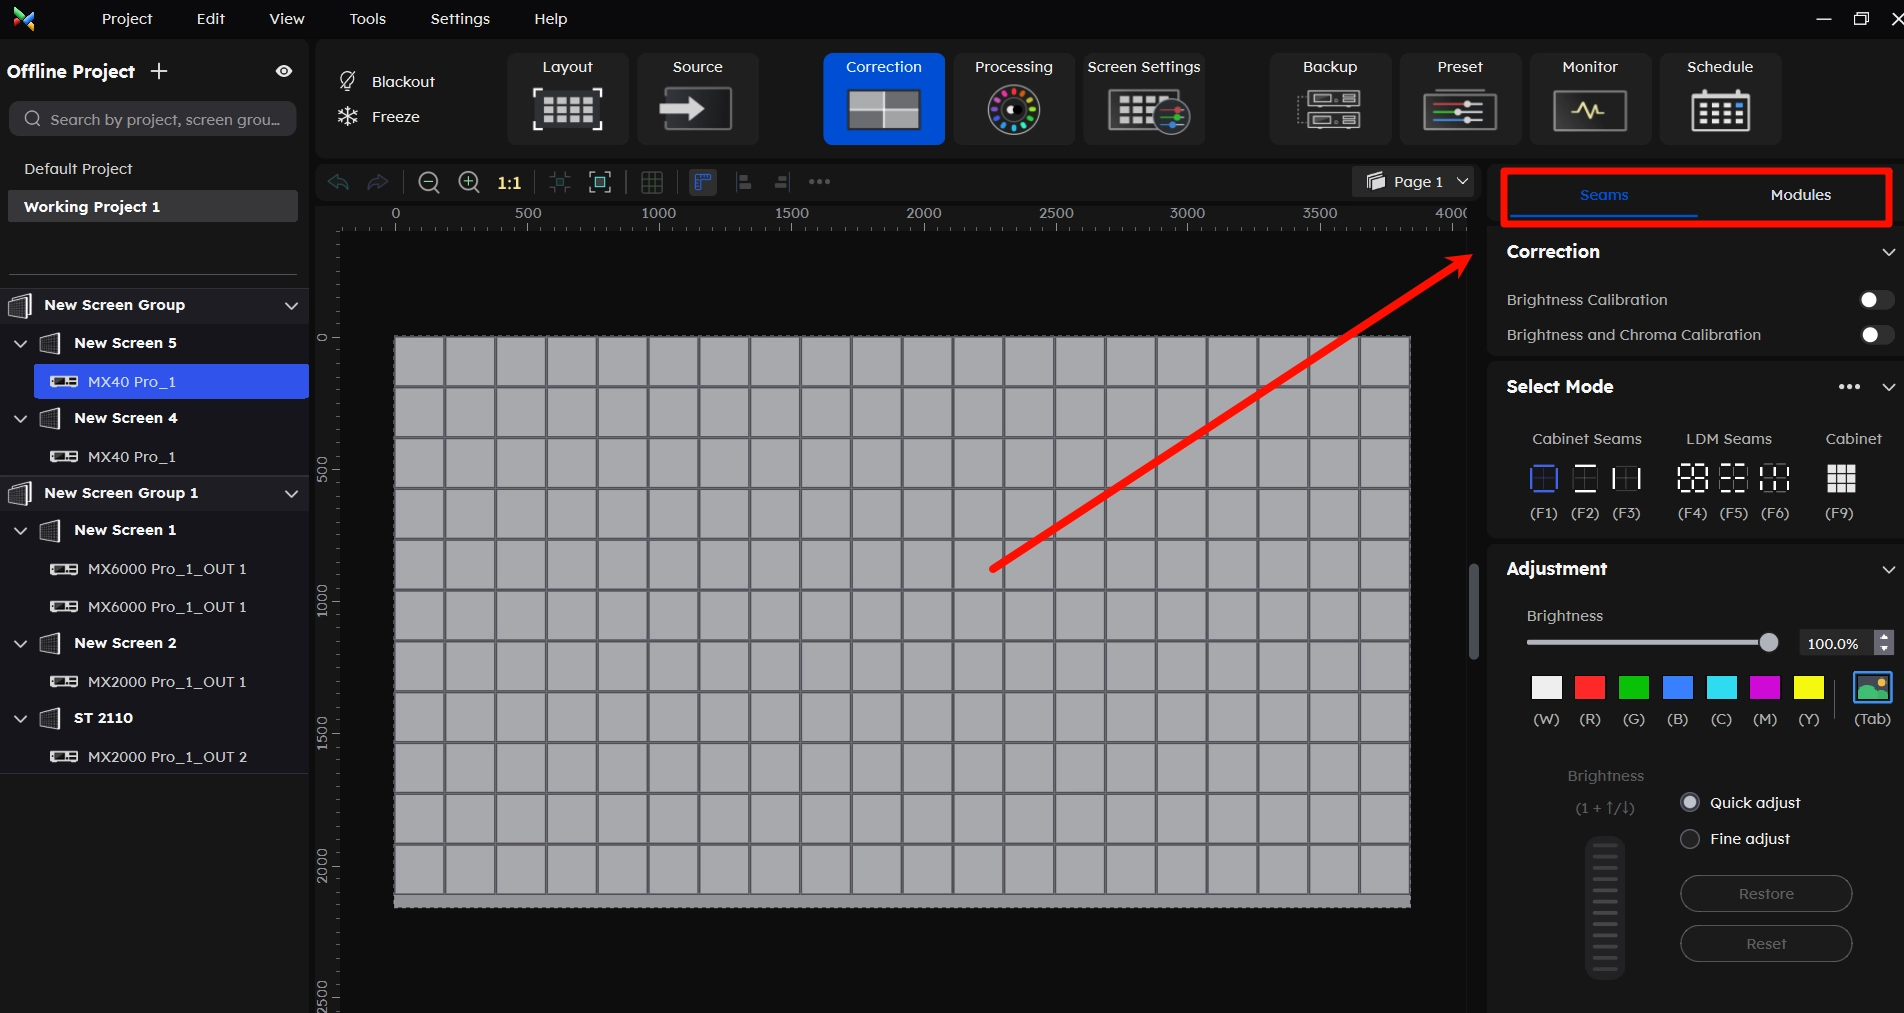
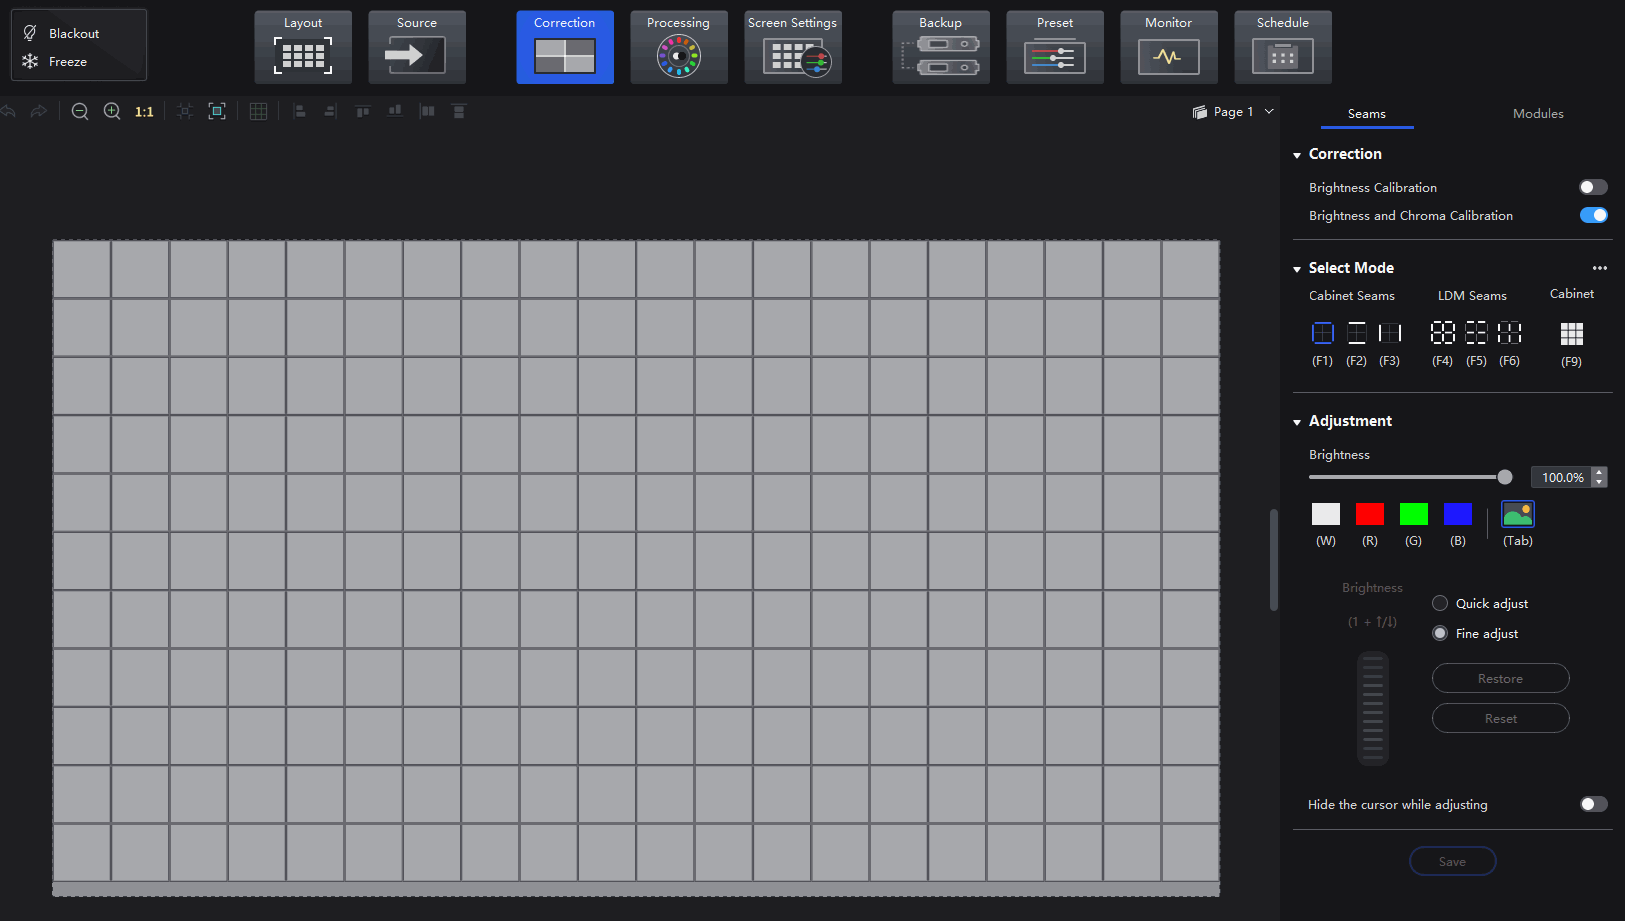
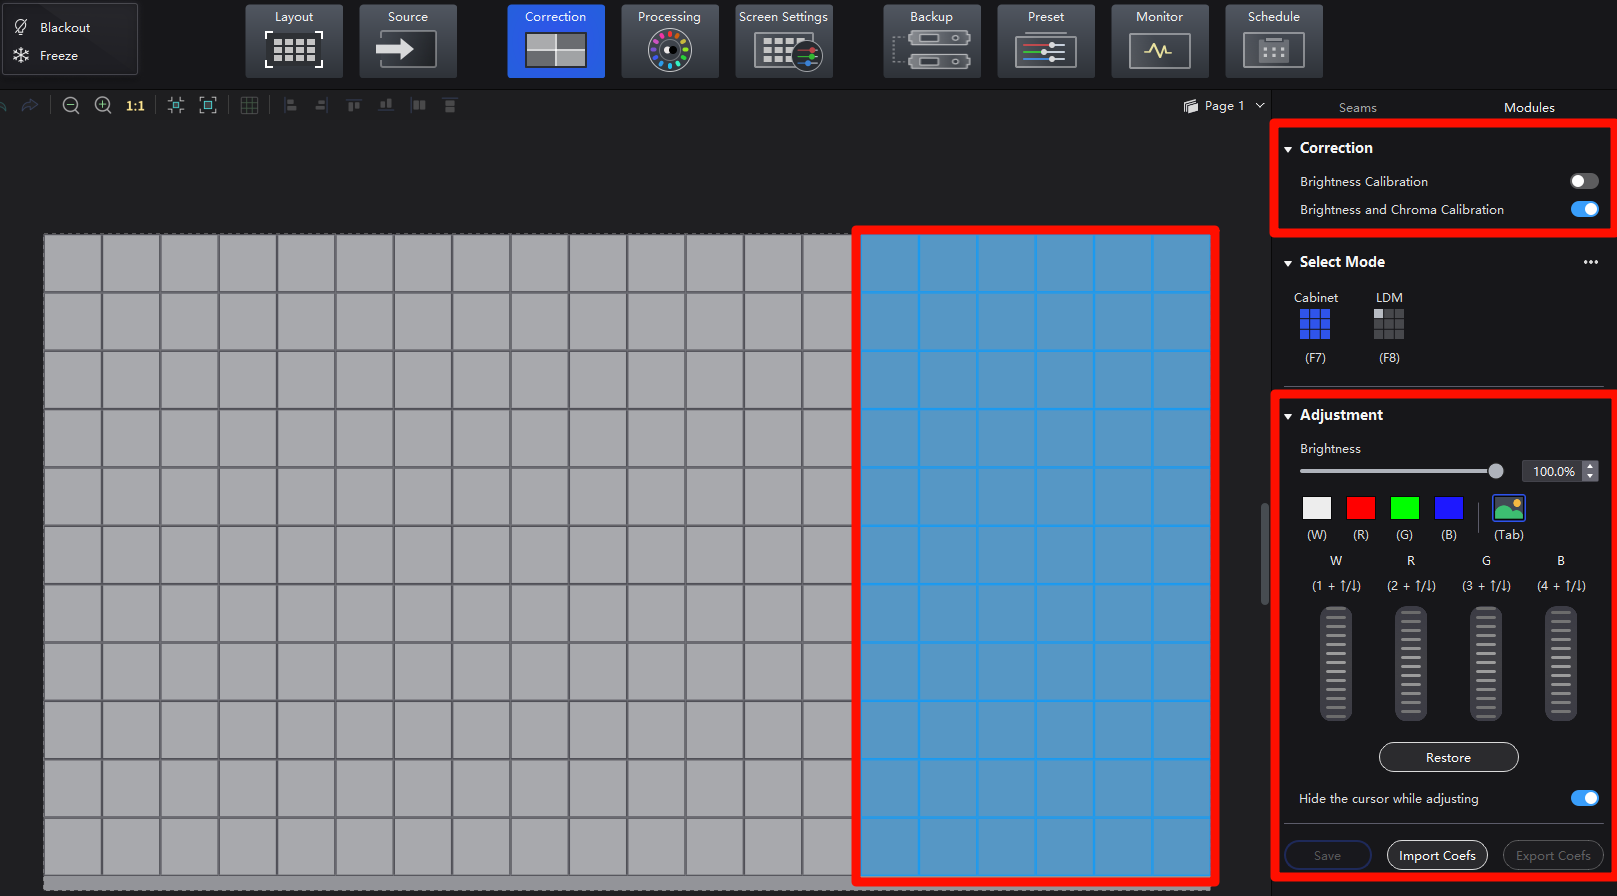
After entering VMP, click Correction in the top function bar.
Click on Seam at the top of the function area to access the Seam Correction interface.

If you use the special RV Card (A10s Pro, CA50E, and XA50 Pro), with new NCP file,
the VMP will have 7-color adjustment. If not, there will be a 4-color adjustment.

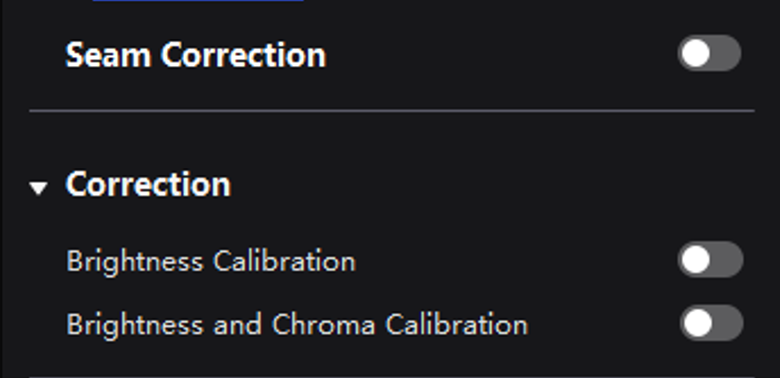
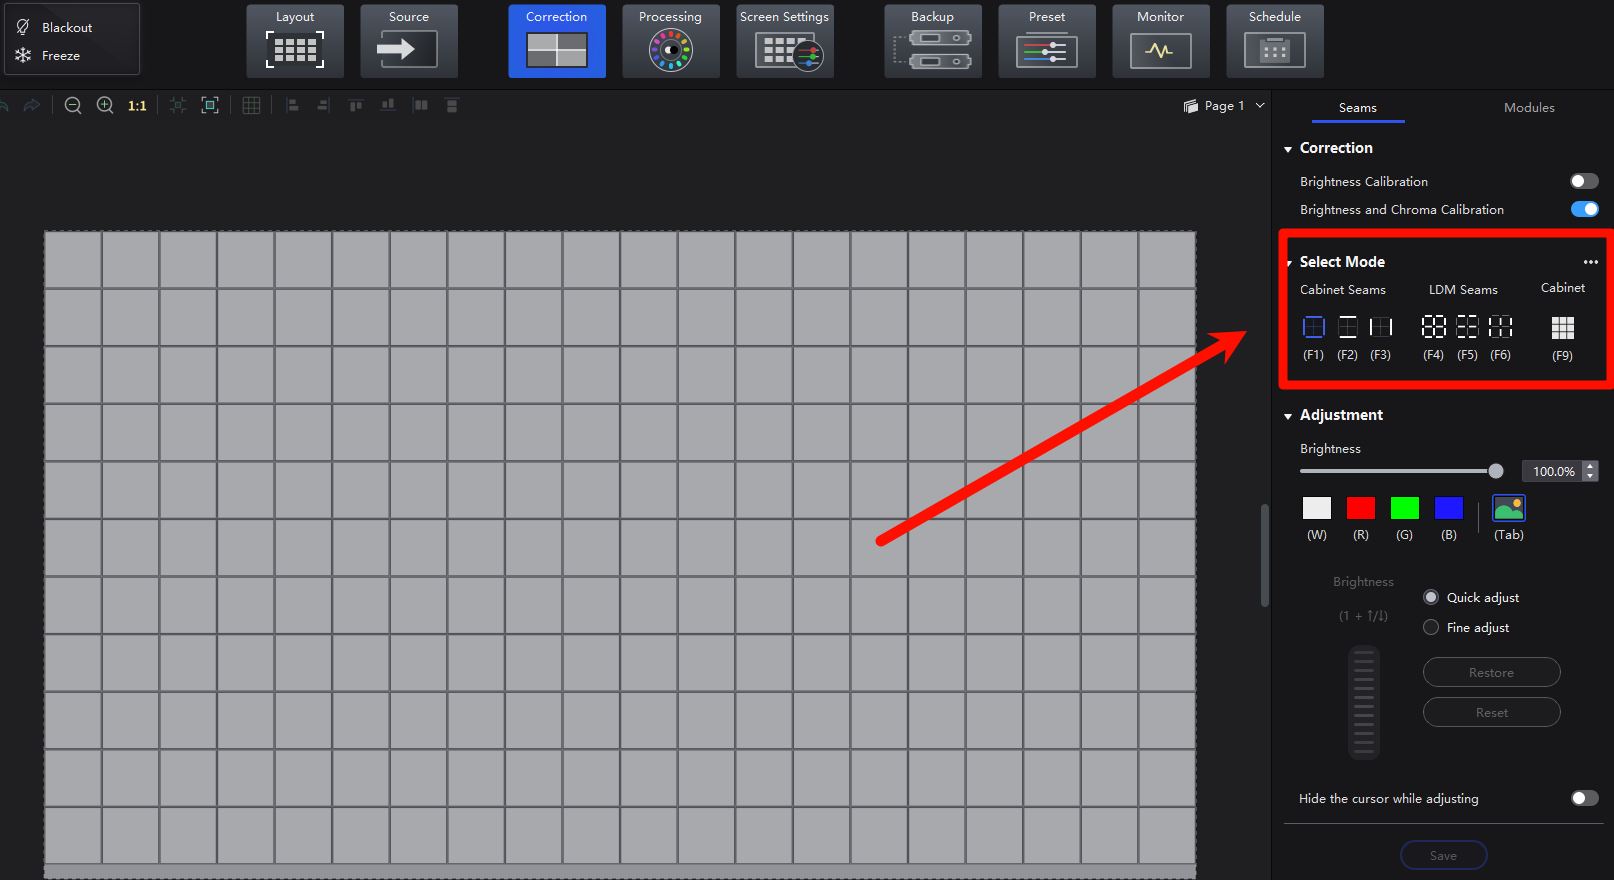
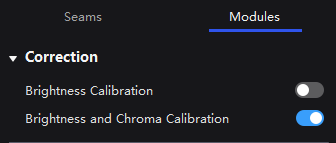
¶ Calibration Effect ON/OFF
The Seam Correction interface only displays the Brightness Calibration and Brightness & Chroma Calibration on/off.
Seam Correction coefficients are stored independently in the user area on the receiving card.
The calibration effect on/off is only for the user to view the correction effect under different calibration effects.
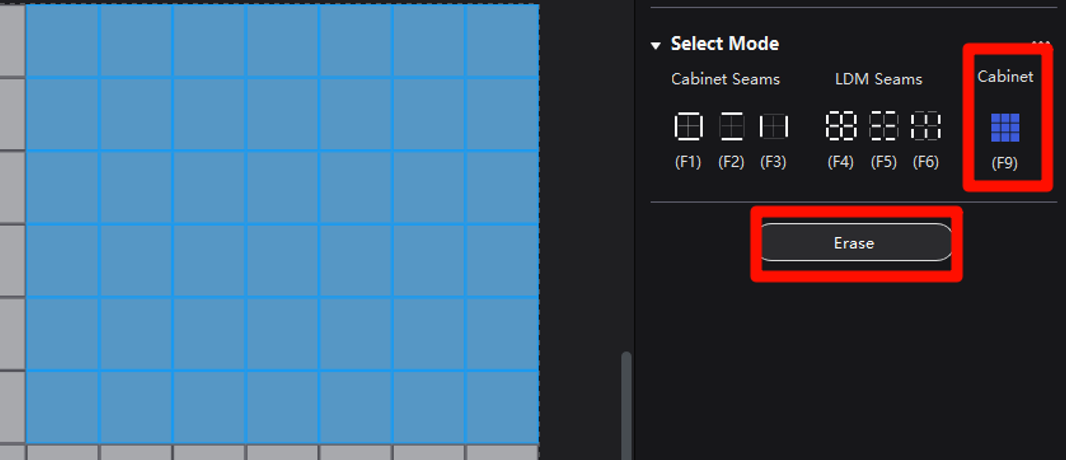
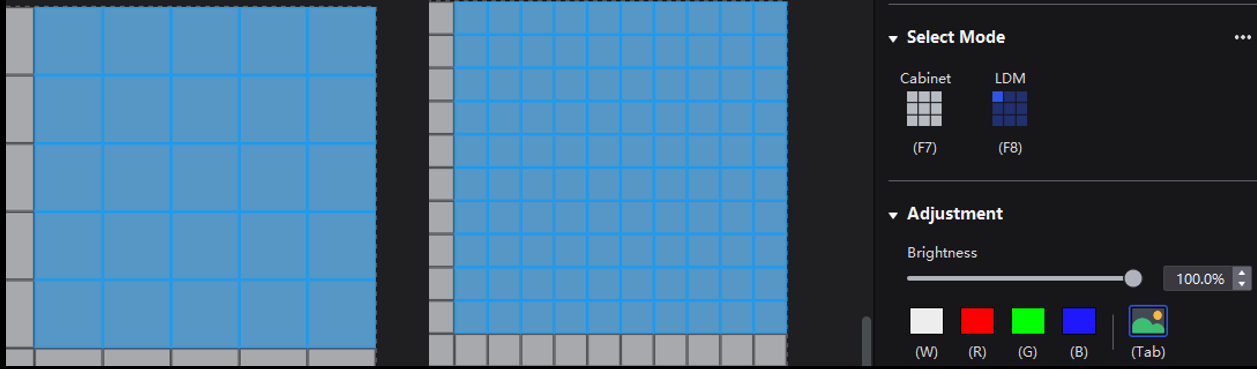
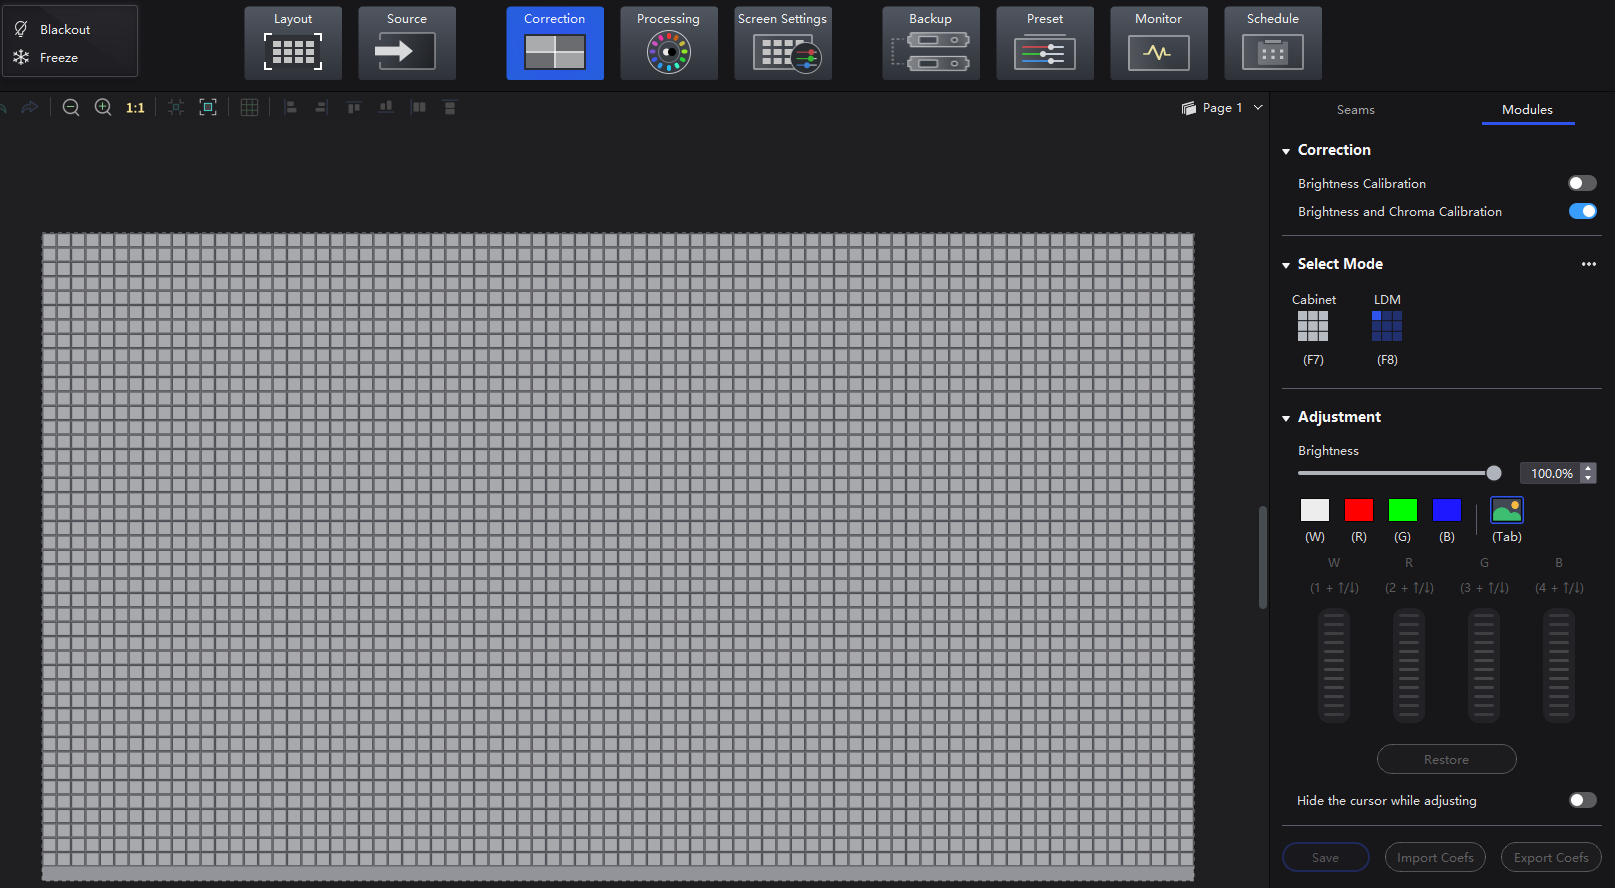
¶ Select Mode
¶ 3 Cabinet Mode
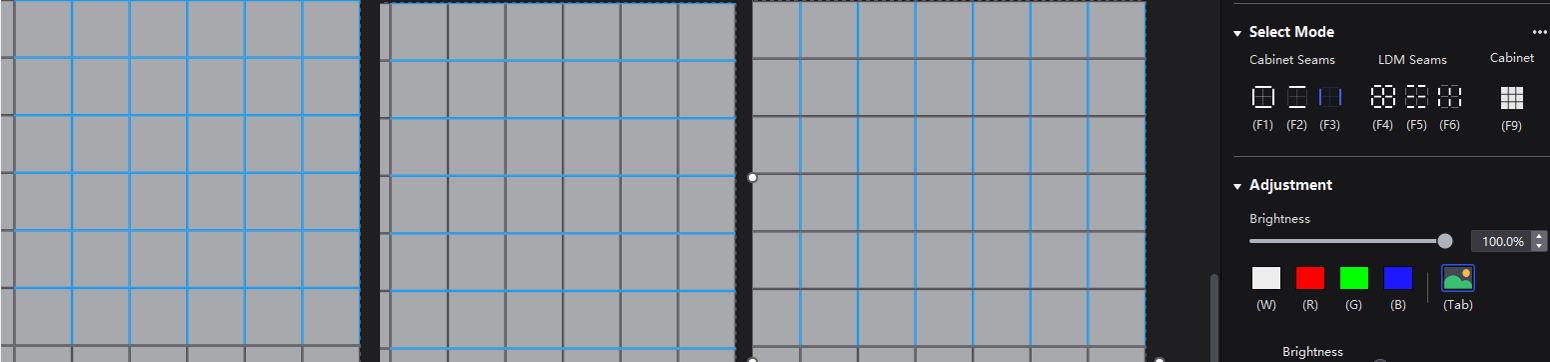
¶ 3 Module(LDM) Mode

¶ 1 Erase Mode
Select the area and click erase to remove all the seam correction coefficients.
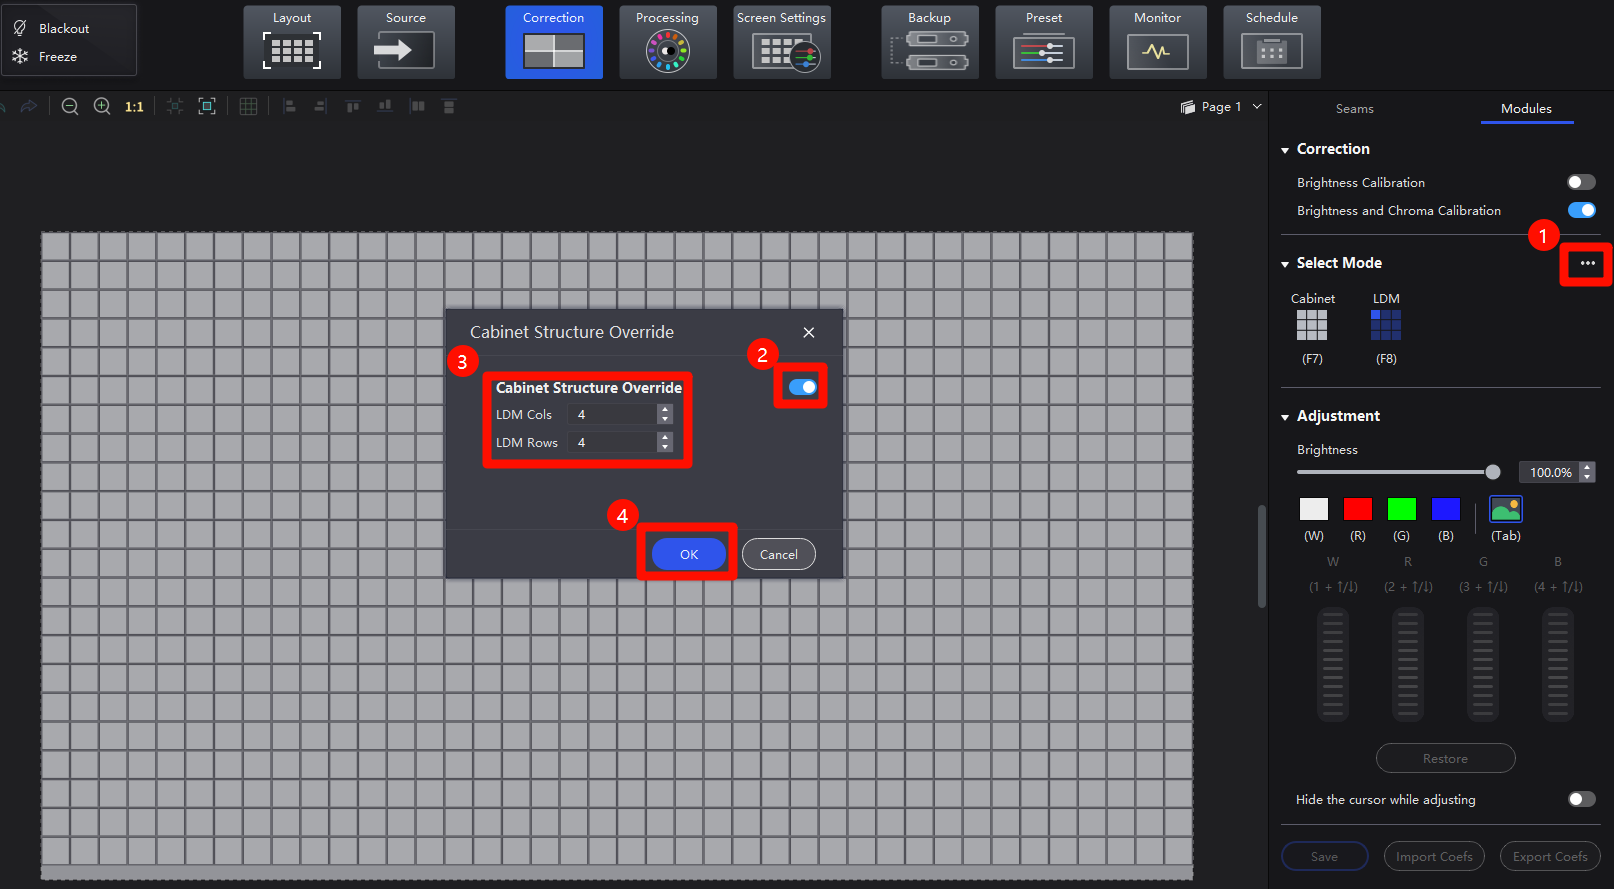
¶ 1 Cabinet Structure Override
Change the module layout in the cabinet while keeping the cabinet resolution unchanged.
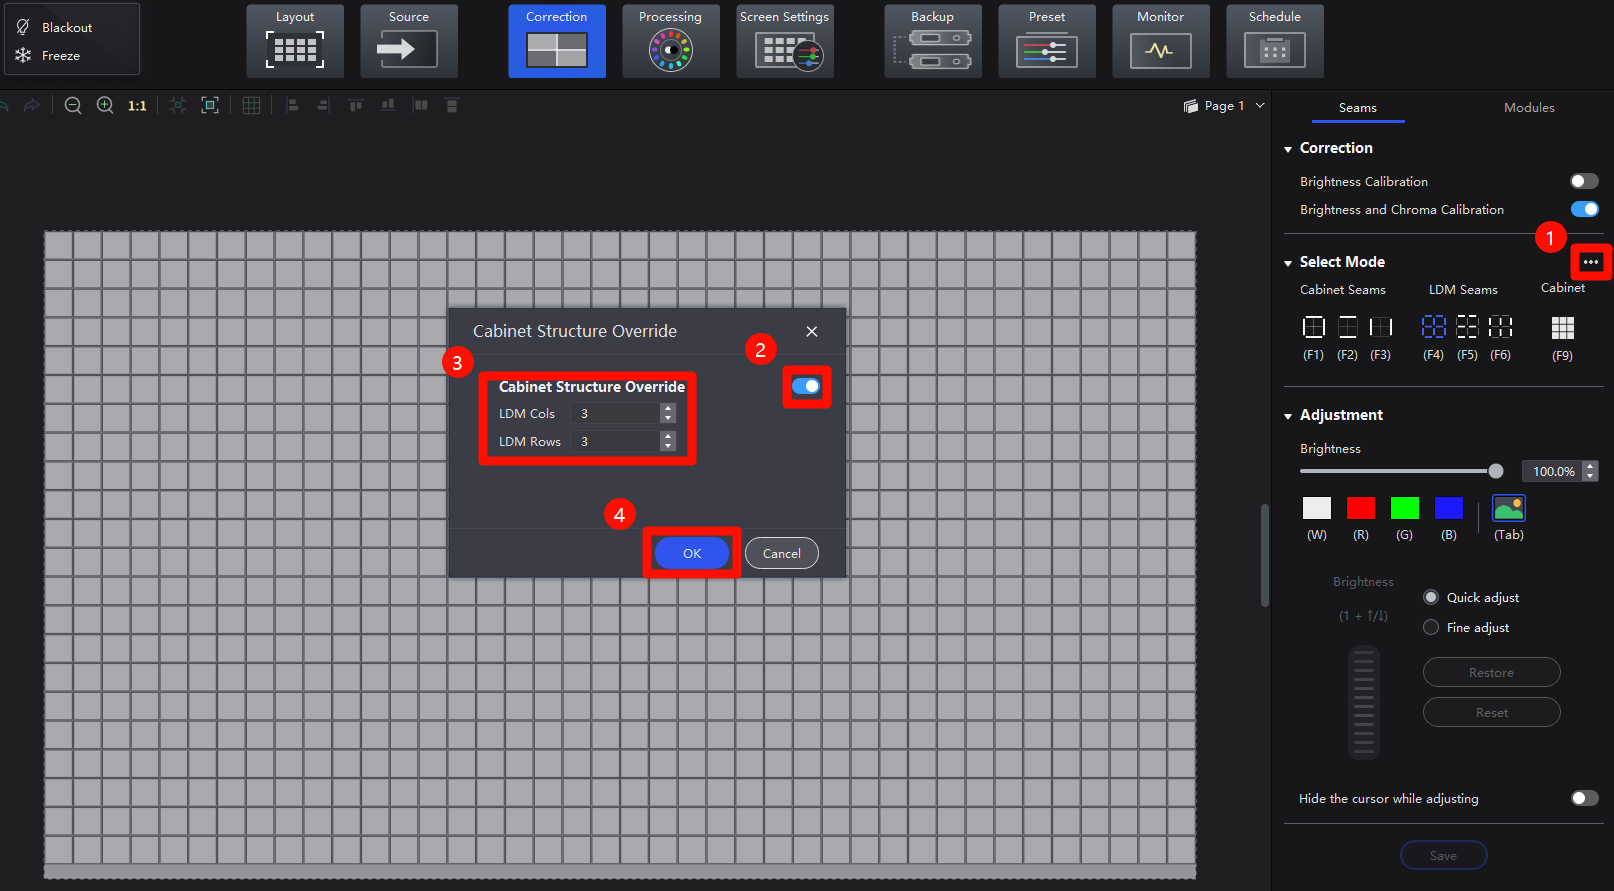
Application Scenario:
1) The layout of the cabinet modules on the software side does not match the actual layout of the cabinet modules.
2) The seams caused by the installation method are not in the smallest unit of the module, such as the seams half the length of the side seams of a module.
¶ Unilateral and Bilateral Adjustment
In the seam adjustment interface, when you use the mouse to select a module or cabinet seam, the VMP defaults to adjusting the brightness on both sides of the seam.
If you hold the “Shift” key while selecting the seam, you can switch to adjusting the brightness on only one side of the seam.
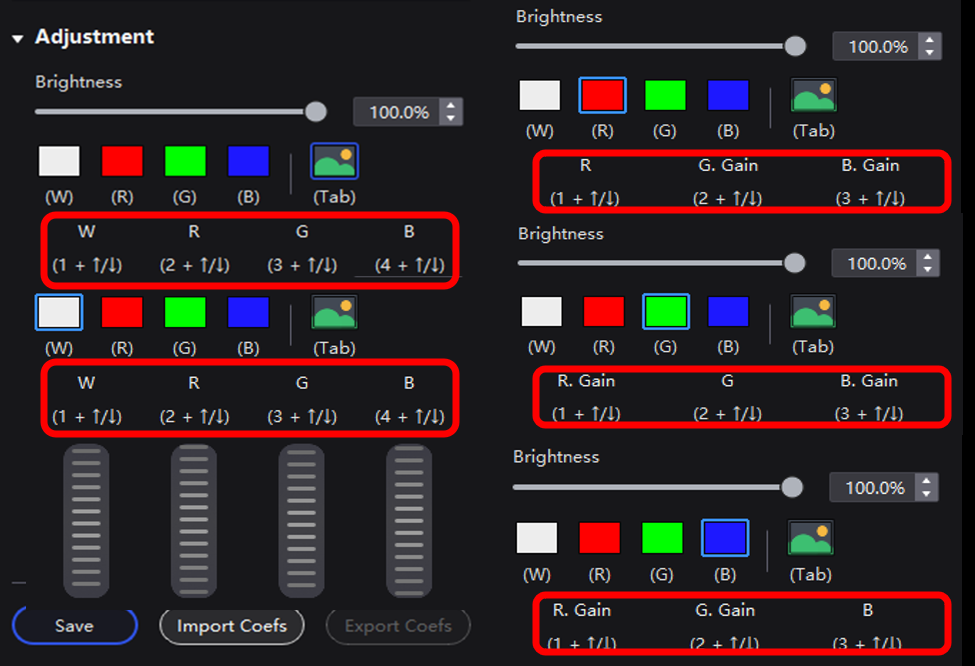
¶ Coefficient Adjustment
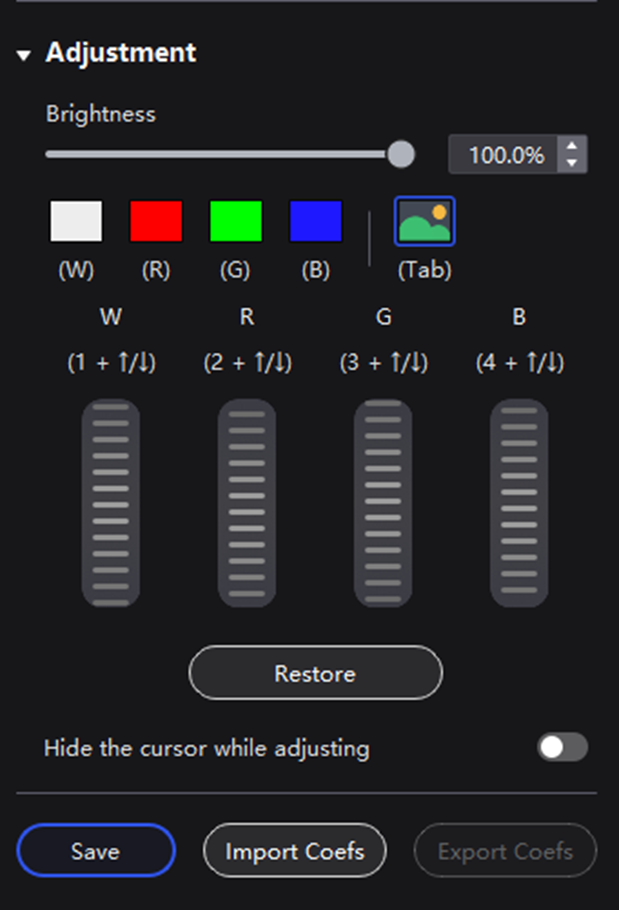
Brightness adjustment and various test patterns are provided to help users check the effect of seam correction in various situations.
Quick Adjustment and Fine Adjustment:
1 unit of Quick Adjustment equals 10 units of Fine Adjustment.
Shortcut:
- Mouse on the scroll wheel of the software interface, scrolling up and down as usual.
- Press 1+⬆️ / 1+⬇️ keys on your keyboard at the same time.
Restore:
Abandon the current correction effects and restore the screen seam correction to the last stored state.
Reset:
Abandon all the seam correction effects and restore the screen to the never-adjusted state.
Cursor switch:
ON/OFF for selected seams cursor on the screen.
¶ Seam Correction Demonstration
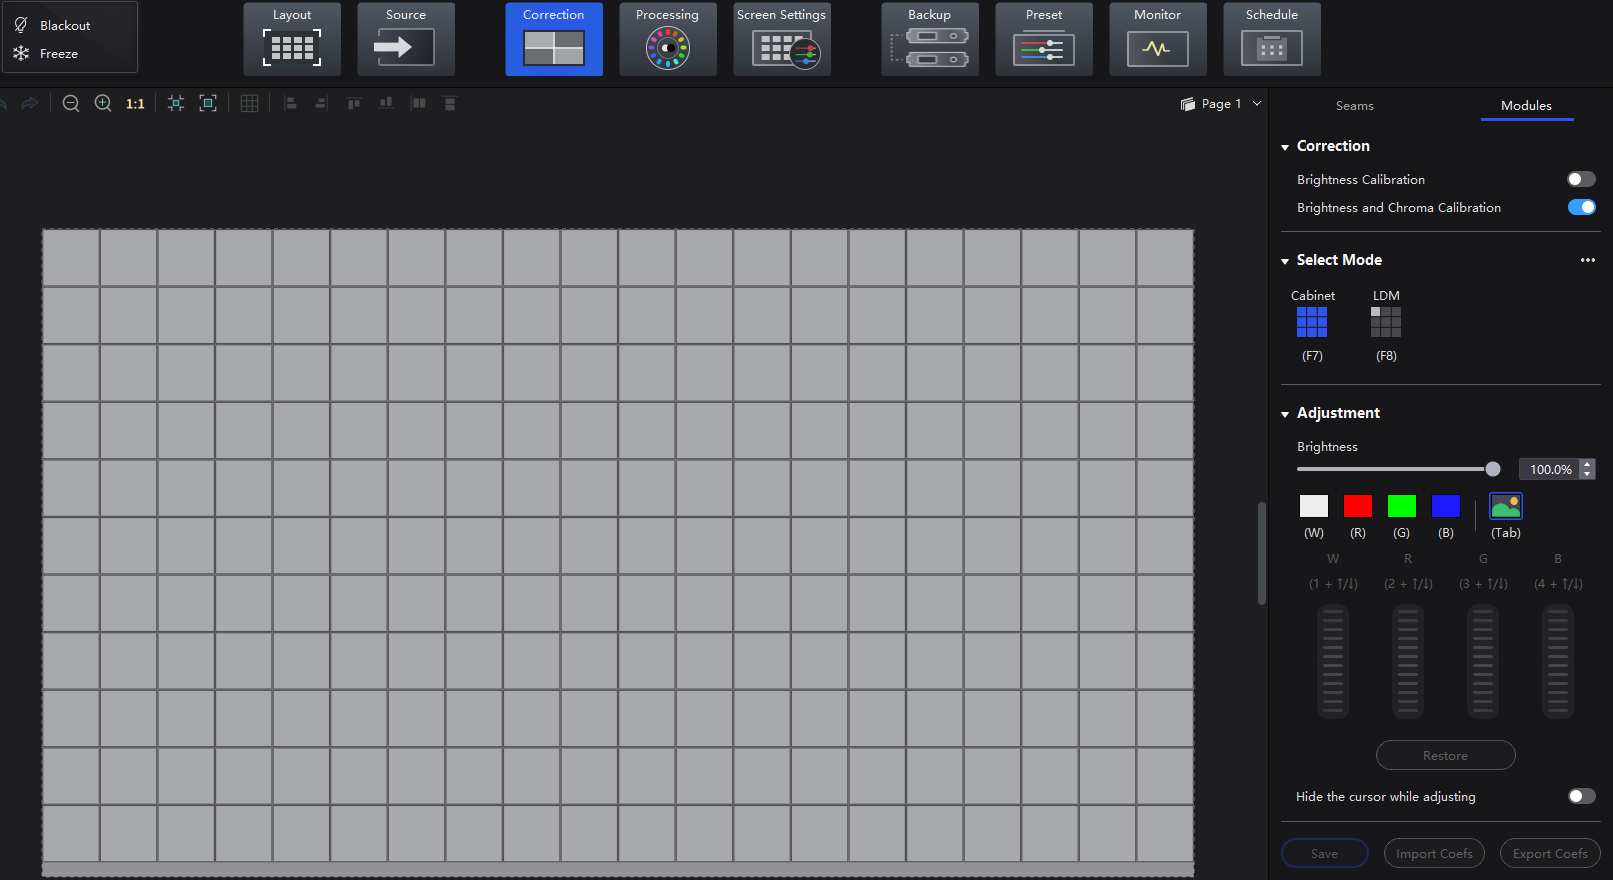
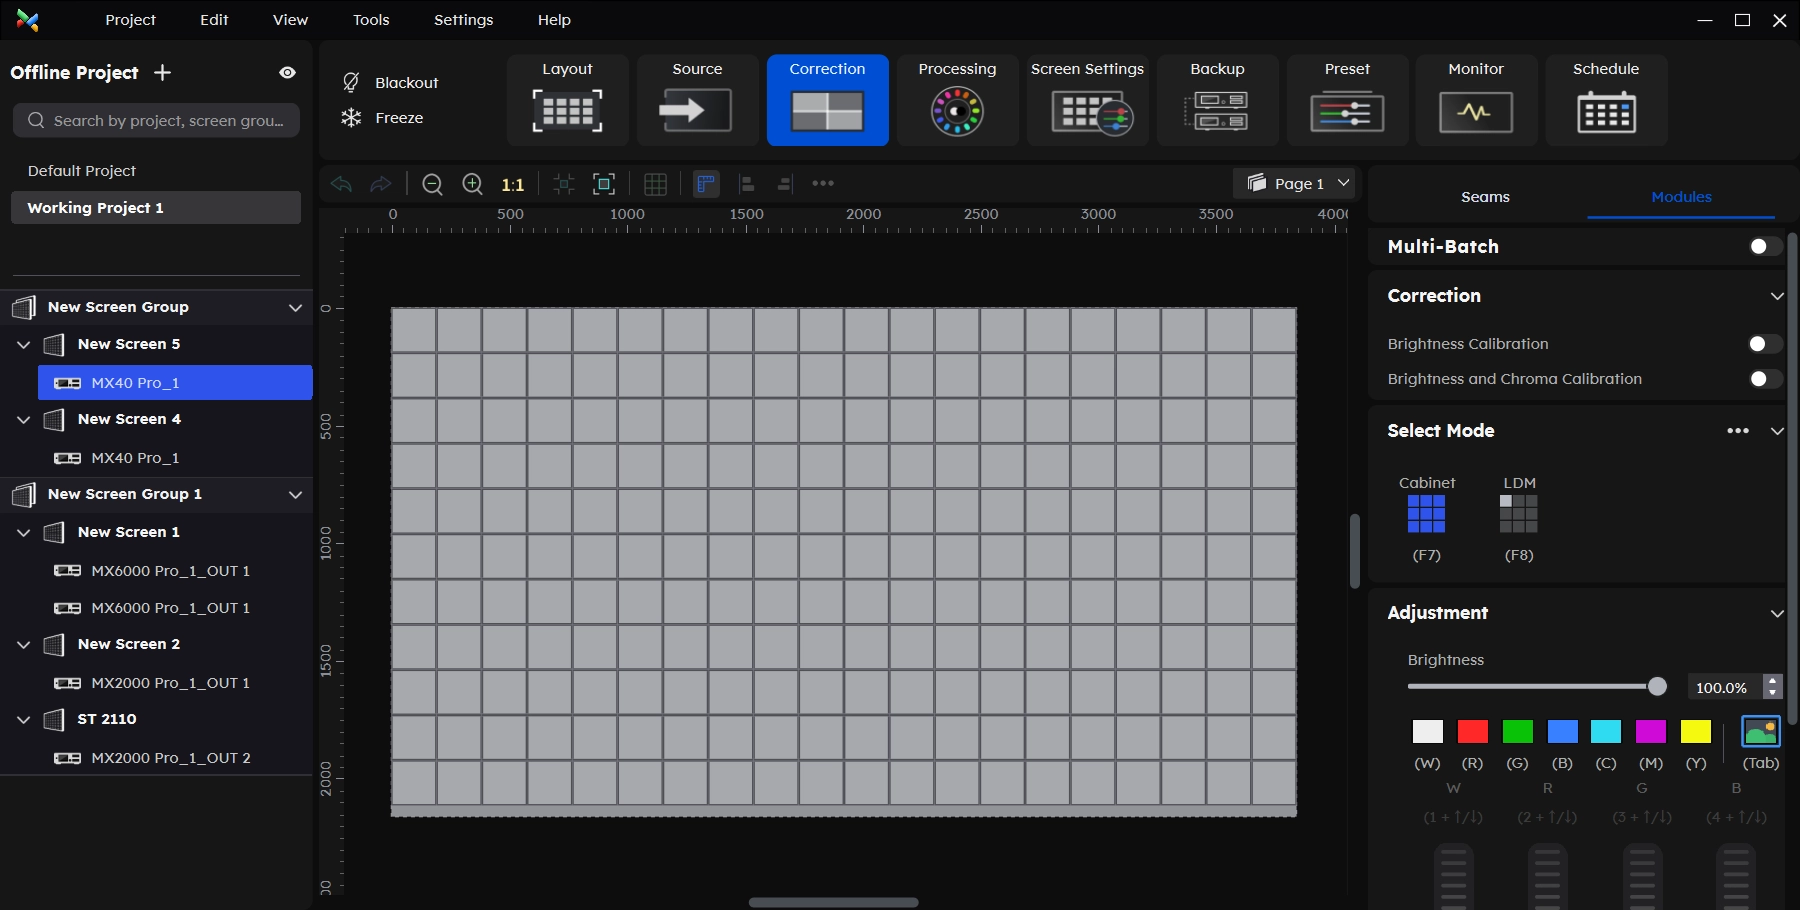
¶ Multi-batch Adjustment
When a screen for various reasons, using different batches of cabinets or modules, results in some of the brightness or chromaticity display inconsistency, then it needs the multi-batch adjustment.
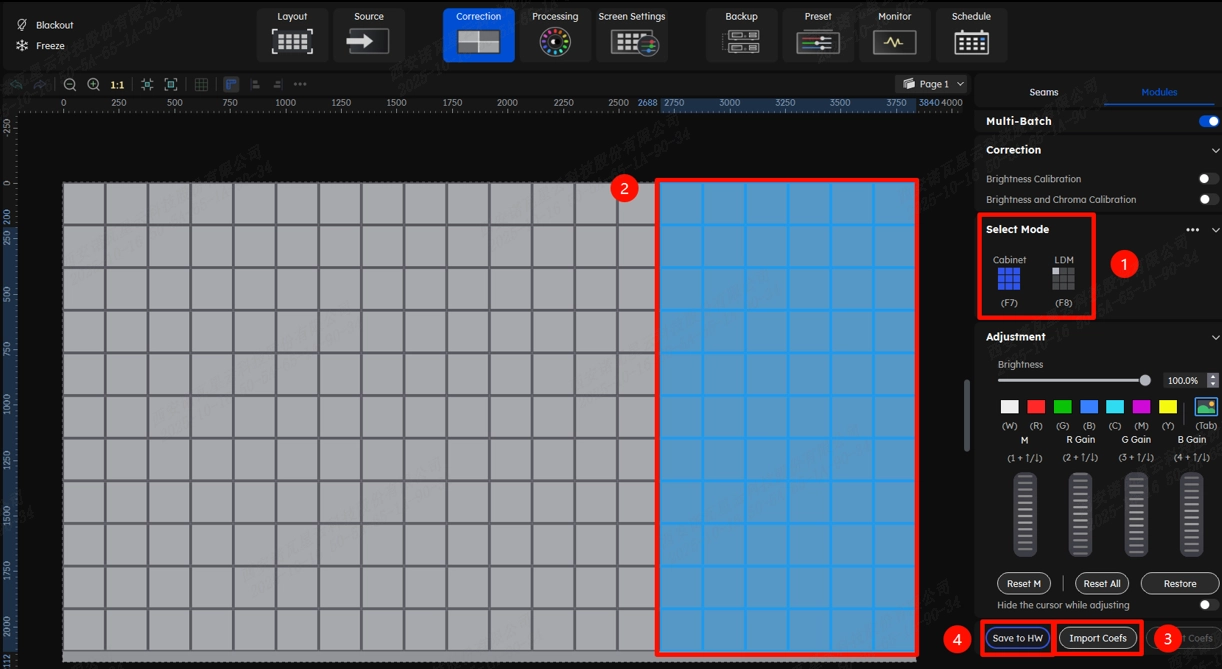
Once in VMP, click on Correction in the top function bar.
Click Module at the top of the function area to enter the Module Correction interface.
The Module Correction interface is a specialized solution to the problem of multiple batches, collectively referred to as multi-batch adjustment.
Similarly, If you use the special RV Card (A10s Pro, CA50E, and XA50 Pro), with new NCP file, the VMP will have 7-color multi-batch adjustment. If not, there will be a 4-color adjustment.
¶ Calibration Effect ON/OFF
Only the brightness and brightness & chroma calibration on/off will be displayed.
In the previous version, the Multi-batch Adjustment coefficient needs to be fused with brightness and chroma calibration or brightness calibration coefficients for storage.
Therefore, users have to enable a calibration effect in this interface for storing the effect of multi-batch adjustment.
In Version 1.5.0, the multi-batch adjustment coefficients have been optimized into independent coefficients.
In the current version, no matter what modifications users make to the multi-batch effects, they will not affect the original calibration anymore.
¶ Select Mode
¶ Cabinet and Module Mode
¶ Cabinet Structure Override
Change the module layout in the cabinet while keeping the cabinet resolution unchanged.
Application Scenario:
The case in which the cabinet module layout on the software does not match the actual cabinet module layout.
¶ Coefficient Adjustment
Shortcuts:
- Mouse on the scroll wheel of the software interface, scrolling up and down as usual.
- Press 1+⬆️ / 1+⬇️, 2+⬆️ / 2+⬇️, 3+⬆️ / 3+⬇️, 4+⬆️ / 4+⬇️ keys on your keyboard at the same time.
Cursor switch:
ON/OFF for selected cabinet cursor on the screen.
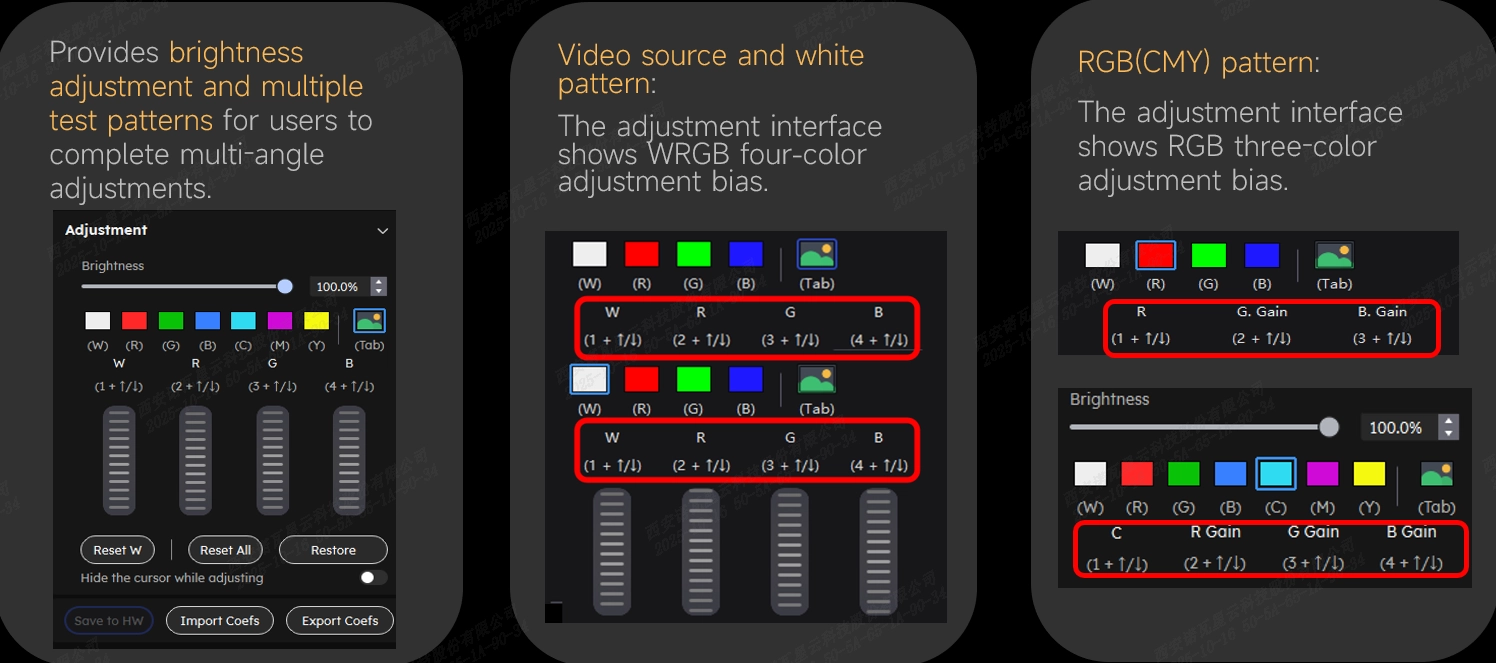
¶ V1.4.0 and Previous version
Brightness adjustment and multiple test patterns:
Provides brightness adjustment and multiple test patterns for users to complete multi-angle adjustments.
- Video source and white pattern: The adjustment interface shows WRGB four-color adjustment bias.
- RGB pattern: The adjustment interface shows RGB three-color adjustment bias.
Notes:
Since the multi-batch adjustment coefficients need to be stored in fusion with the brightness or brightness and chroma calibration coefficients, please make sure that one calibration effect is turned on before adjustment.
Restore:
Abandon this adjustment effect and restore the effect to the last stored state.
There is no Reset function here,
i.e., once the multi-batch adjustment is saved, it is fused with the correction coefficients and cannot be restored to the unadjusted state except for reading back the unmodified calibration coefficients.
¶ Version 1.5.0
Brightness adjustment and multiple test patterns:
Restore:
Abandon this adjustment effect and restore the effect to the last stored state.
Reset:
Abandon all the seam correction effects and restore the screen to the never-adjusted state.
For 7-color adjustment, VMP supports the color level reset.
For 4-color adjustment, VMP only supports one button to reset all coefficients.
¶ Coefficient Export
The export coefficients function only supports exporting adjustment coefficients for a single module or cabinet.
Click on an adjusted module or cabinet and click Export Coefs to export the coefficients and store them to PC.
Note:
The coefficients of multi-batch adjustment support cross-mode upload, and the cross-mode upload interface does not display the file information. If the user has multiple coefficient files with different modes, please pay special attention to differentiating the coefficient file naming.
¶ Coefficient Import
Select the cabinet or module, and click Import Coefs to select the multi-batch coefficient file from the local.
After successful import, check the effect of multi-batch adjustment and click Save to HW after confirming.

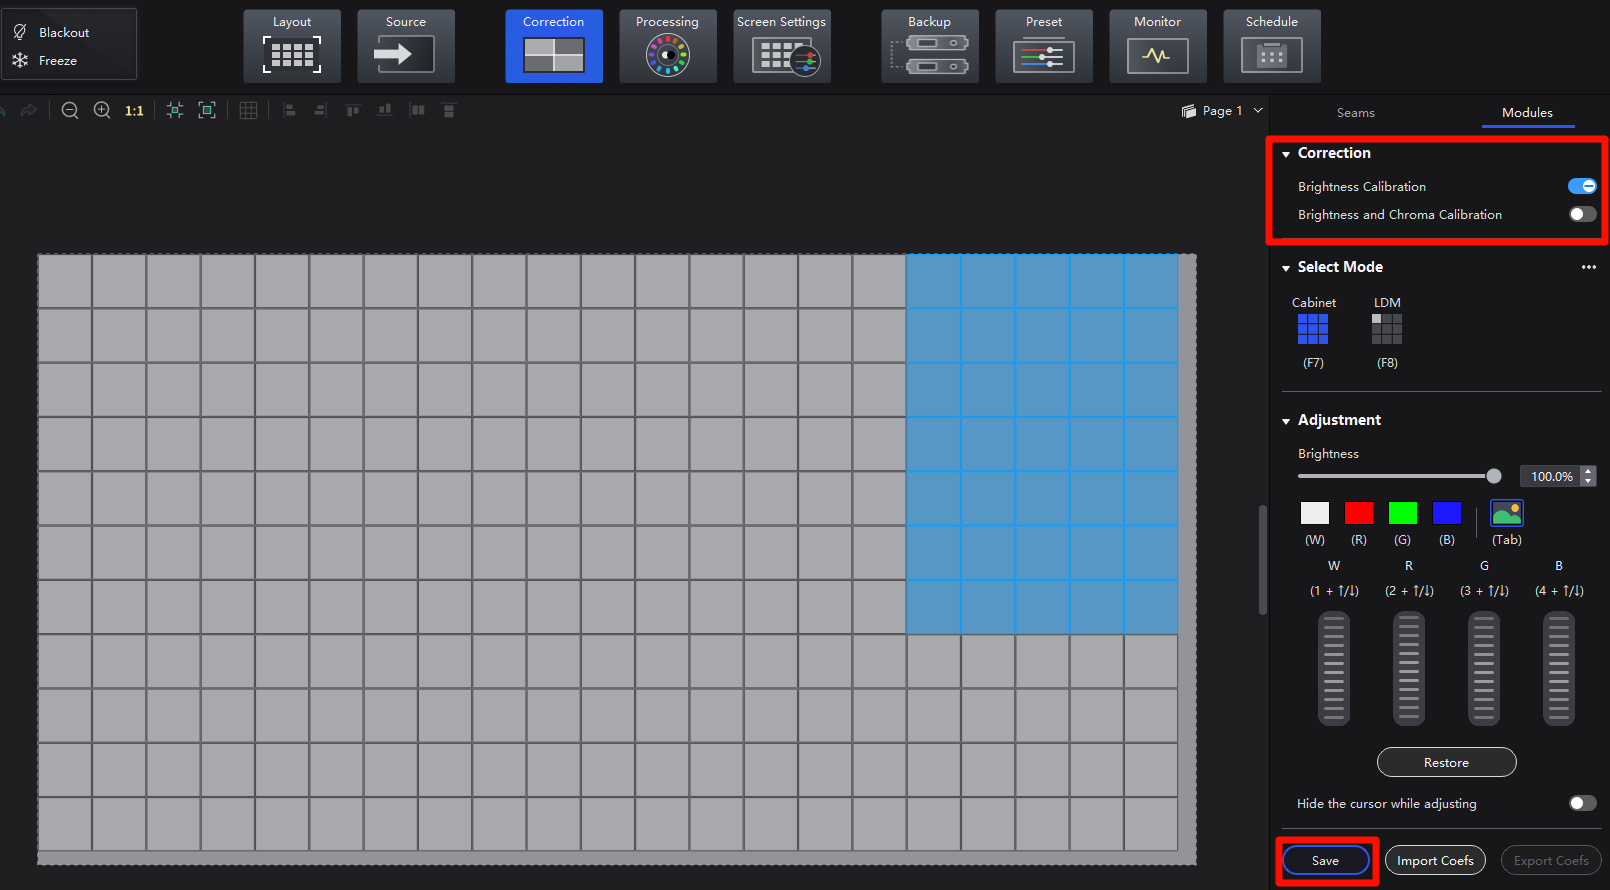
¶ Save
After clicking Save, the user's current adjustment will be fused with the calibration coefficients. And the adjustment effect cannot be undone.
So please confirm the effect before saving operation.
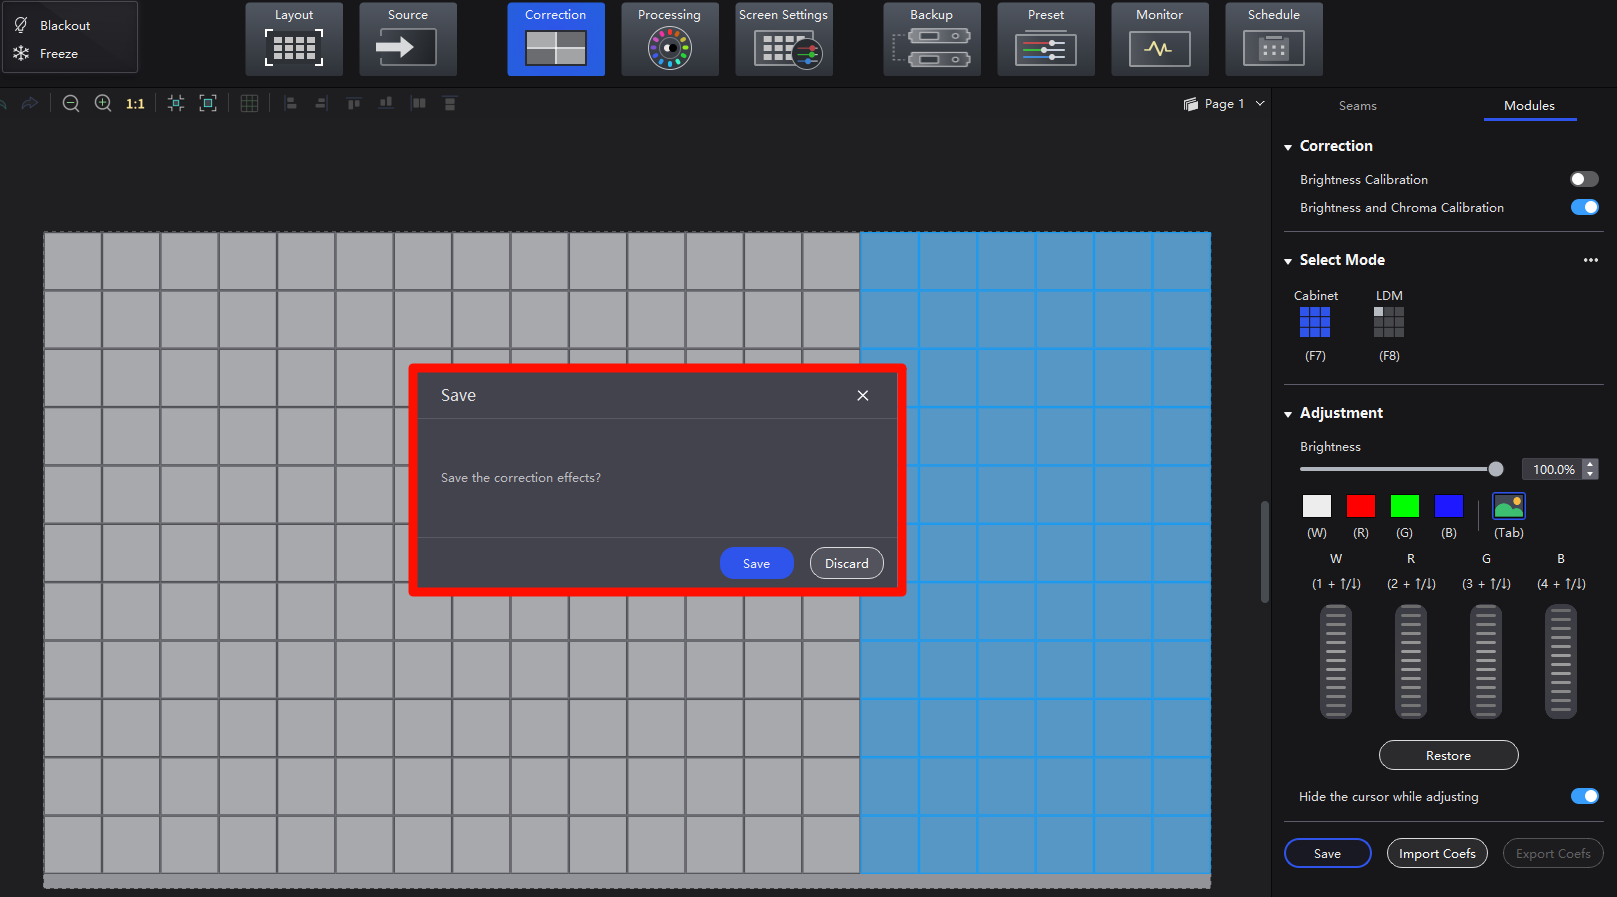
¶ Discard
When the user has made a coefficient adjustment in the Multi-Batch Adjustment Interface, but has not saved it, if the user wants to switch to another VMP interface, the software will pop up a prompt window.
It will ask if the previous adjustment needs to be saved.
- If the user clicks Save, the multi-batch adjustment will be saved.
- If the user clicks Discard, any adjustments made since the last Save will not be saved.
¶ Copy and Paste
The multi-batch adjustment coefficient supports copy-and-paste operations.
Right-click on any cabinet or module that completes the multi-batch adjustment
Ctrl + C to copy the coefficient
Choose the range that requires an adjustment coefficient
Ctrl + V to paste the coefficients
¶ Multi-batch Adjustment Demonstration
We consistently enhance and refine the content of our Wiki articles.
If you find any mistakes or errors, please contact us.
Your continuous feedback and support will help us further improve our products and content.